FAQs - Screenshots in Windows
HOW TO DO SCREENSHOTS IN WINDOWS®
This document will include steps for taking the best possible screenshot (or capture) of your saved eSigns.com design using some basic features included with all versions of Microsoft Windows. Certain small steps may differ, depending upon which version of Windows you may have, but the essentials for any given step will be the same.
| Key Symbols: |
|---|
|
|
|
|
|
|
|
|
|
|
|
|
|
|
|
|
|
|
-
Screenshot — getting the initial screenshot (of capture) image. The final image will be modified to remove everything except the online design image.
-
Final Image — removing the parts of the screenshot we do not want, and then saving the image for further use (such as circulation to a committee for approval).
If you have an account at eSigns.com, please log into your account. When logged in, click the My Account link located to the right of where the email address you’re using is displayed at the top of the page. On your My Account page, click on My Designs to open the list of designs you have saved in your account. Find the design that you’d like to make a screenshot of and open the design in the online tool by clicking on the thumbnail image of it or on the blue Online Design button.
If you have been using eSigns.com as a guest, it will work best if you are using the same computer used when the design was originally created and saved. Look for and click on the link named My Saved Designs at the top of the page. There should be a number other than zero displayed as part of this link if you have already saved one or more designs. Find the design that you’d like to make a screenshot of and open the design in the online tool by clicking on the thumbnail image of it or on the blue Online Design button.
Though it is not necessary to do so, it may help to print this guide for future reference and to aid in reducing the number of open program windows that you might have to bring to the front of your screen.
Throughout this article I'll be using keyboard shortcuts. If you're not familiar with them, a keyboard shortcut is a way to do something in Windows using one or more of the keys on your computer keyboard in combination (quite commonly, two keys). For these the article uses symbols that represent the keys involved. The symbols will appear in the order the keys are to be pressed. As an example, the Paste command uses the Control and V keys. To use this shortcut, press and hold a Control key (![]() ), then press the V key (
), then press the V key (![]() ), and release both of them together. This keyboard shortcut is commonly noted as:
), and release both of them together. This keyboard shortcut is commonly noted as:
![]()
![]()
![]()
You should now have the basic idea of what the following will cover, and have the preliminaries taken care of so, at your convenience, please continue reading and begin the first step.
Step 1 – Screenshot:
In this step we will load a copy of the entire web browser window onto the Clipboard.
To make the initial screenshot (sometimes referred to as a screen capture), open the online design you'd like to make a screenshot of, and scroll down as needed so that the entire design is visible in the browser window. Once the design is in position, use the 'Copy Active Window to Clipboard' keyboard short cut ![]()
![]()
![]() to place an image of the browser window onto your computer's clipboard. (The clipboard uses the computer's physical memory (RAM) to store things like text, images, and so on. There will not be a visible effect for this.)
to place an image of the browser window onto your computer's clipboard. (The clipboard uses the computer's physical memory (RAM) to store things like text, images, and so on. There will not be a visible effect for this.)
If the Print Screen key on your keyboard has more text on it that that, please note whether or not Print Screen is the first or second line. If Print Screen is first, then the rest of these instructions may be followed as they are. If Print Screen is second, then you will have to use a combination of keys, such as ![]() +
+ ![]() . That is, Function and Print Screen together.
. That is, Function and Print Screen together.
I've done this, getting the image immediately below as a result:
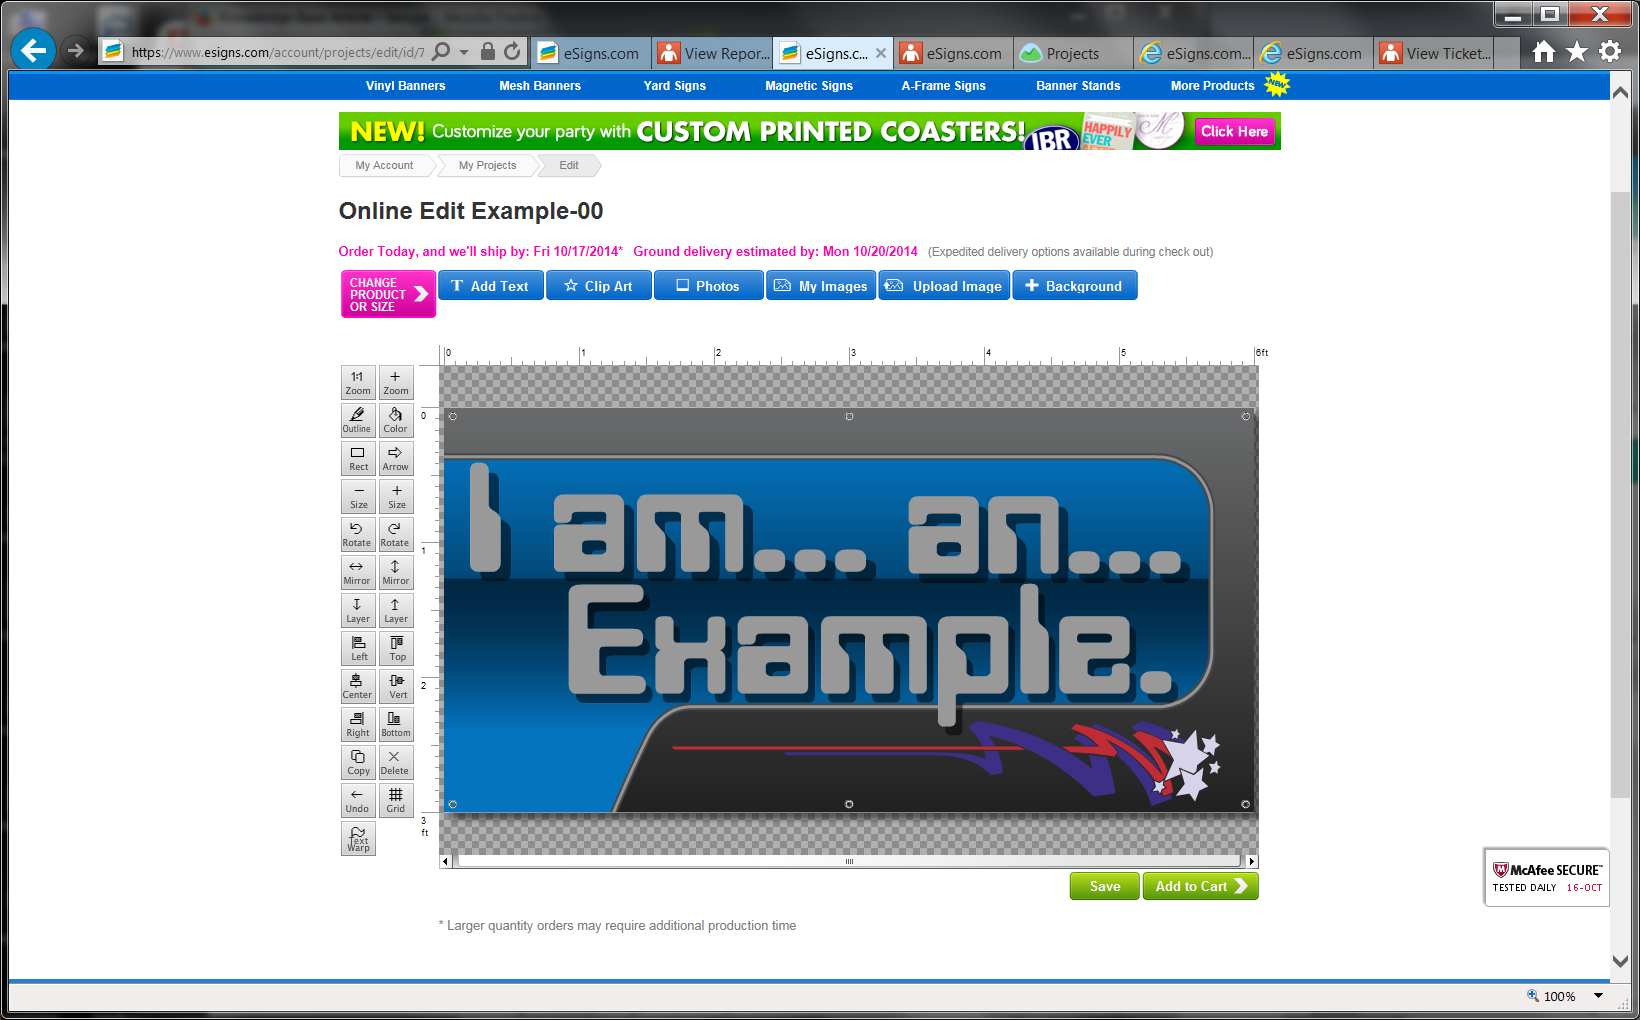
This completes Step 1, now you should be ready to move on to Step 2 and make the finished screenshot.
Step 2 – Final Image:
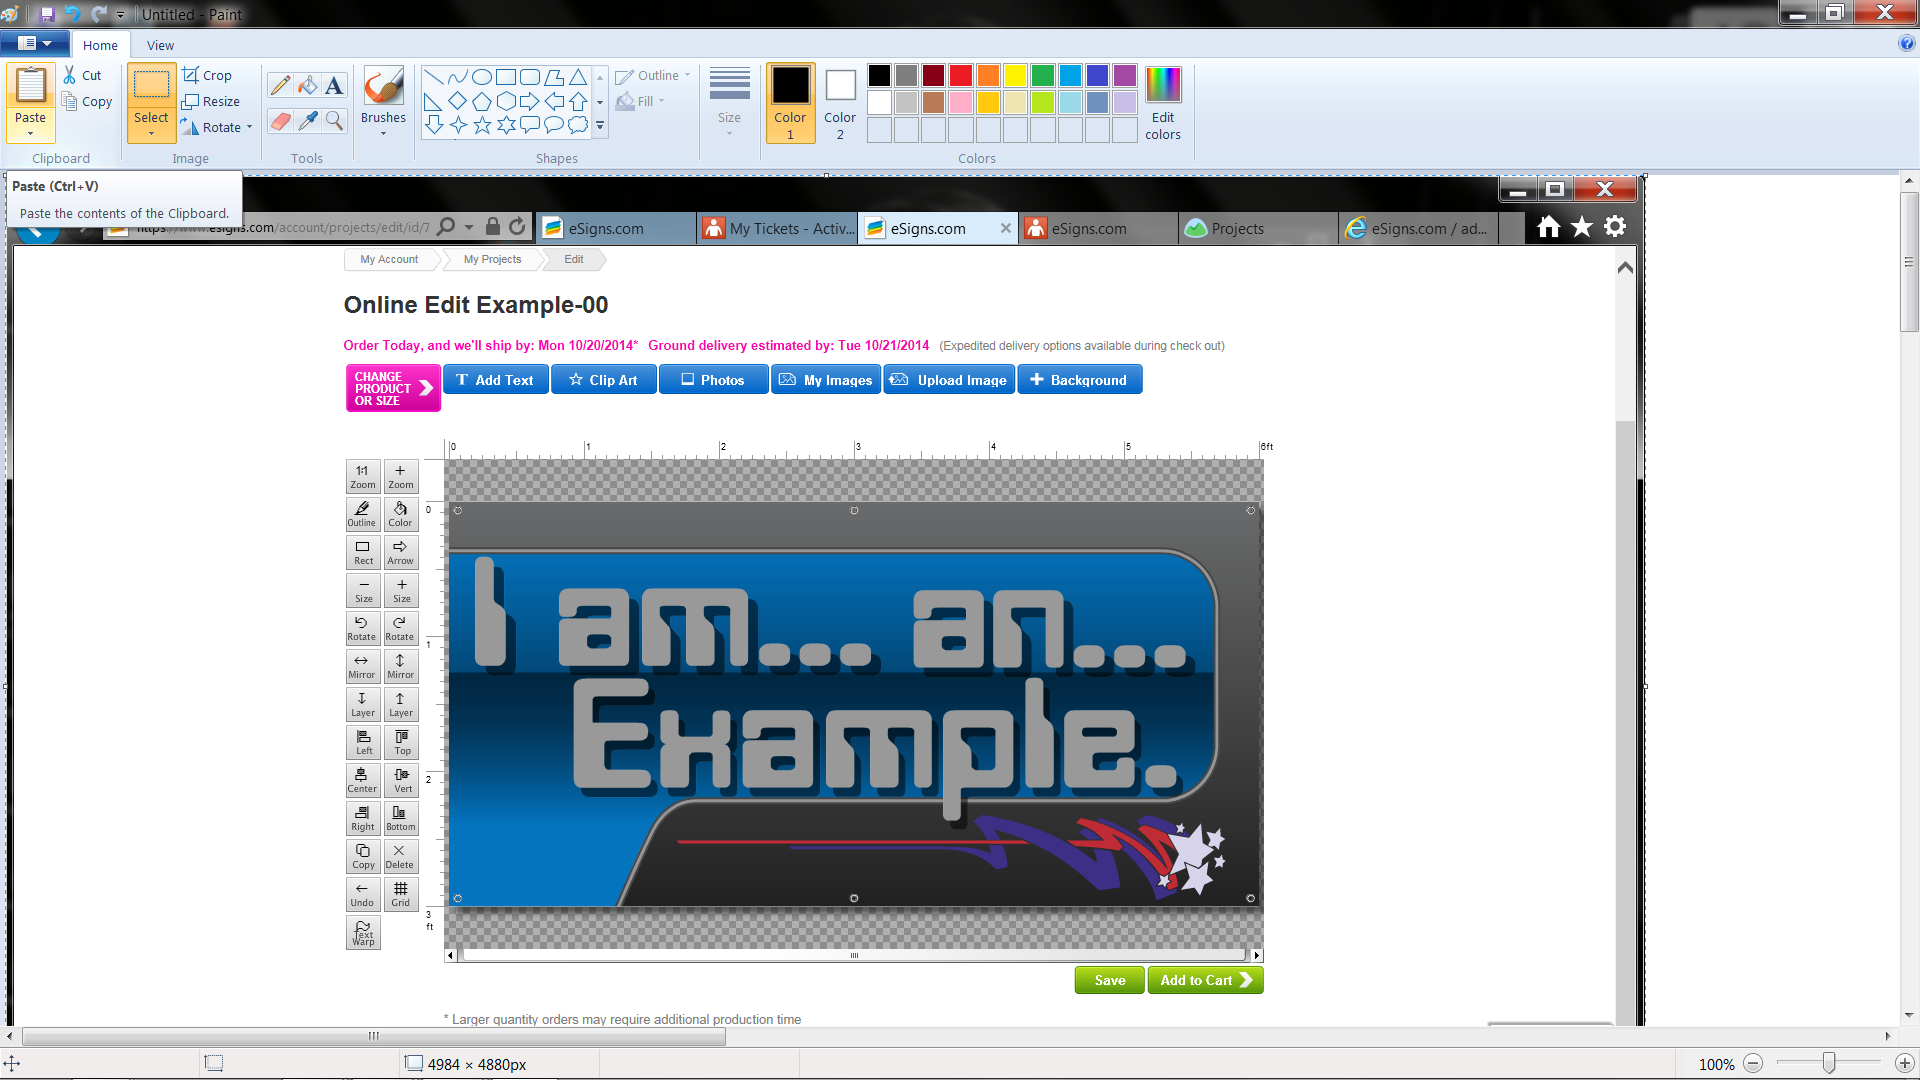
After using the paste command, you should see that what was shown in the web browser is now visible in Paint as an image. Continuing below, we will select just the design and then remove the rest of the image.
And finally, the result will be saved to your computer for limited use. A copy for your records, circulation for order approval, and so on. Please do not use the result for printing other sign types, as that will violate the eSigns.com license agreement and terms of use:
You may find it helps to zoom out a step of two so that the entire screenshot is visible in your Paint window.
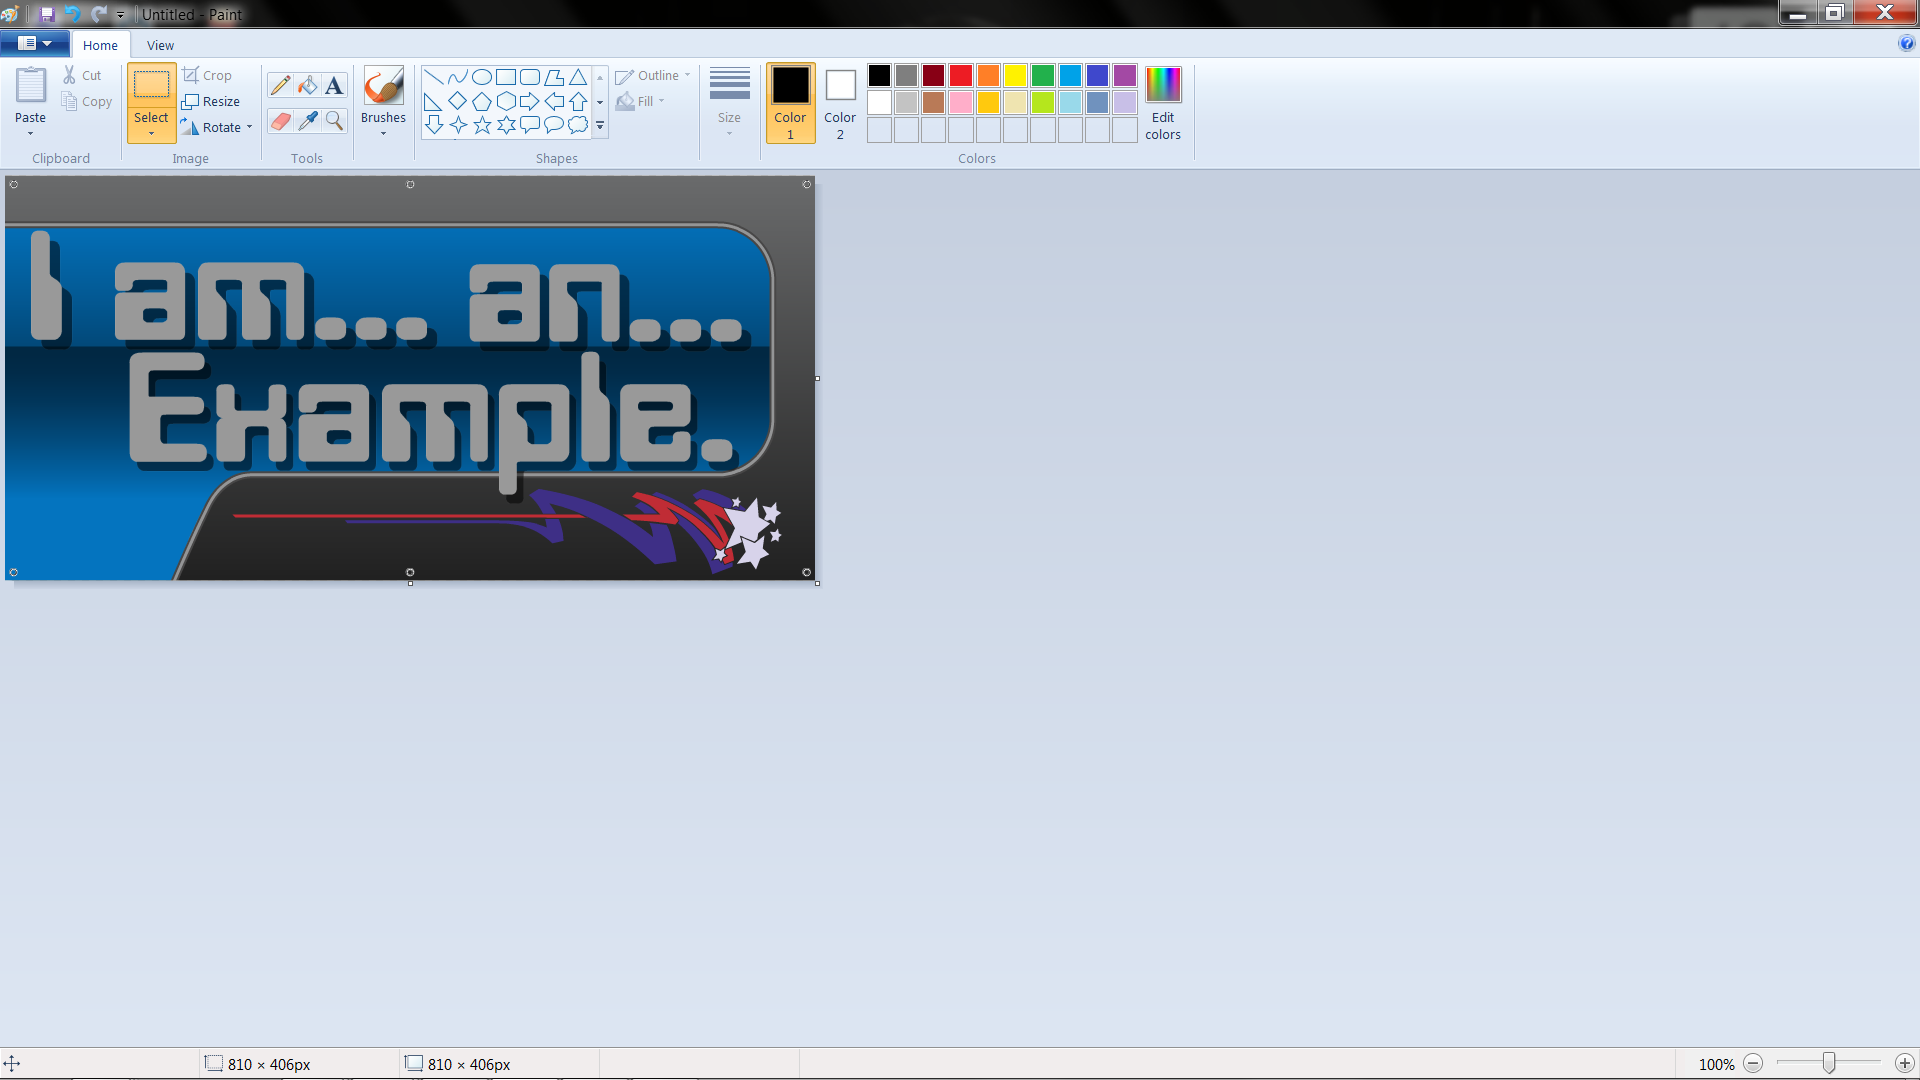
Next, select the sign image using the Select tool (In Paint 6.1, click the Home tab, and then click the Select button. Move the mouse over to one corner of the sign, then click & drag the cursor to the opposite corner of the design to select it all. With the design selected, click Crop to remove everything outside of the design ( ![]() +
+ ![]() +
+ ![]() is the Paint keyboard shortcut for the Crop command.).
is the Paint keyboard shortcut for the Crop command.).
 |
And finally, it is time to save the resulting image. When saving the JPG and PNG formats should give you the best results with the smallest file sizes.
There are various ways to use the Save and Save As commands, one of the easiest is to use the keyboard combination
I’ve selected the JPG format to get the image shown below.
And that is all, you should now have a saved image that be shown to others without having to be logged into your eSigns.com account (or giving your log in information to others, which is not recommended).
Thank you and I hope that you've found reading this brief guide to have been helpful.
|

Don't see what you're looking for?
Browse by Category
ORDER YOUR BANNERS NOW
More Knowledge Base Articles
Banners
- Vinyl Banner Comparison Chart
- The Ultimate Vinyl Banner Installation Guide
- Importance of Properly Making Vinyl Banners
- Tips Cleaning Vinyl Signage
- Preserving Vinyl Banners
Banner Stands
- How to Set-up Jumbo Backdrop Stands
- How to Set-up Double Step Retractable Banners
- How to Set-up Economy Retractable Banners
- How to Set-up L Stand Banners
FAQs
- Genera FAQs
- RGB VS CMYK Color Models
- Color Wheel and Converter Tool
- Vinyl Banners FAQs
- Yard Sign FAQs
Yard Signs
You're welcome to contact us by Telephone (1-800-494-5850), Email (cs@esigns.com), Live Chat (using the button located in the top-right on eSigns.com), or Support Ticket.


